3 ways to take a screenshot on a Mac
📋 Table of Contents
Table of contents will be generated automatically based on article headings.
The first two keyboard shortcuts may be familiar to you, but the most useful of the bunch will be the third one.
As a tech blogger on my MacBook Pro, I take a lot of screenshots. To take a screenshot of a selection of my desktop frequently I use the Command-Shift-4 method, If you want to take a screenshot of an open window there are some other ways and that is much easier than the prevailing steps.

For taking screenshots on a Mac let’s review the three keyboard shortcuts. These shortcut helps us to do the task more effectively and quickly.
1. Command-Shift-3
A screenshot of your entire screen is captured here. This is the first step
2. Command-Shift-4
The cursor turns into a crosshair, and that may help you to drag and select a portion of your screen to capture. To take the shot release the mouse button or trackpad. These two steps are already familiar to you. So let’s move to the third and the most useful one.
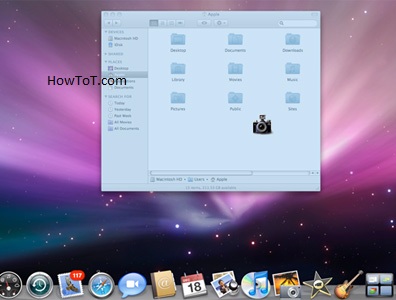
3. Command-Shift-4, then space bar, then click on a window
Hitting the space bar turns the crosshair into a little camera icon, which you can move over any open window. To take a screenshot of it click on your desired window. A white border appears around the window with a bit of a drop shadow in the screenshot captured by this method features .
BW is a contributor at How To Guide. We are committed to providing well-researched, accurate, and valuable content to our readers.
You May Also Like

Related Articles